By ROBIN JENKINSON
SPECIAL TO THE DRIFTWOOD
Late winter, early spring is time to think about Mason bees, also known as blue orchard bees or BOBs. These native pollinators are a fruit farmer’s best friend. During a few weeks in March, Tanya Grant and Gail Bryn-Jones’ grades 4-5 classes at Salt Spring Elementary were gleaning the nectar of apiarian knowledge about these special insects from island experts Ken Hargrove and Harry Burton.
Students first foraged for information at the Rainbow Allotment Gardens behind the Rainbow Road Aquatic Centre, where Marian Hargrove pointed out flower beds filled with heather, crocuses, hellebores and other early bloomers that provide native bees with shoulder-season nectar and pollen. The children were then regaled with Mason bee facts by her husband Ken, and shown the BOB nesting boxes around the community garden.
Ken shared that “Mason bees pollinate about 115 times faster than honeybees.” The crowd was really wowed by his statement that “It takes 2,000 honeybees to pollinate a large apple tree, but only 10-15 mason bees.” The kids suggested that for more effective pollination and honey, someone should cross a honeybee with a Mason bee and call it a “money bee.”
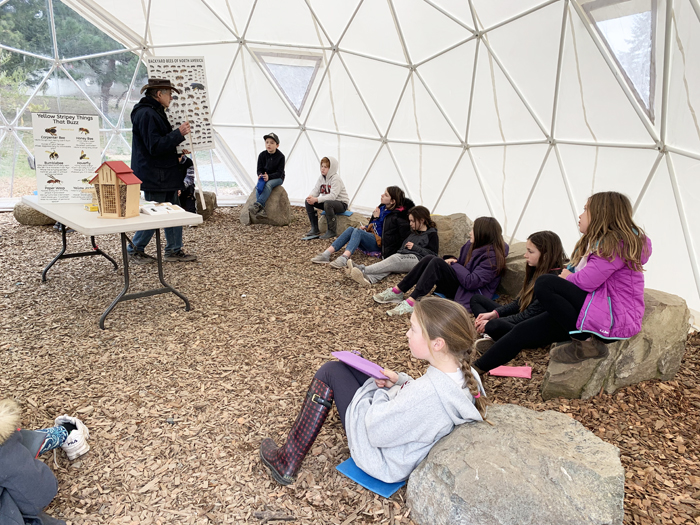
This past week, Harry Burton of Apple Luscious Orchards and Salt Spring Apple Fest fame continued this pollination of young minds in the school’s geodesic dome. He taught about native bee diversity (there are over 450 native bee species in British Columbia) and described the differences between European honey bees and native bees (70 per cent of native bees are ground-nesting and 90 per cent live solitary lives, like the BOB). Although honey bees are familiar pollinators, local wild bees are better adapted. They get busy pollinating even when the air is cool or in light rain, conditions when honeybees stay in their hives.
Then Burton demonstrated how to build the right kind of BOB nests, so they can be taken apart and cleaned each year.
Following Burton’s guidance, 5/16” (about 8mm) grooves were routed in 1×6 pine boards and cut into six-inch pieces. The kids smoothed out the grooves and stacked the pieces and tied them together with baling twine, along with an overhanging roof board.
Finally they mounted it on a sunny fencepost in the Salt Spring Elementary Hillside Garden. Burton provided Mason bee cocoons to release into the garden to pollinate the apple trees when they begin to bloom. Moistened clay will be placed near the nest when the BOB season begins. The children loved gently touching the cocoons and imagining the bees cracking out of their “eggs” in the spring warmth. Pollinator gardens here they come!
The lesson closed with Monika Grunberg’s picture book called Sunshine and Pollen; The Life of Mason Bees, all told from a cheerful Mason bee’s perspective. After she hatches, warmed by the spring sun, the tiny heroine emerges to smell the delicious nectar and revel in all the colours.
“Each flower shows us exactly where to sip. I could hardly wait to dive into one!” she buzzes. “From plants to insects to fruit to seeds and back to plants: this is the Circle of Life.”
Here are Ken Hargrove’s instructions for getting started with your own Mason bee project:
1. Choose the type of Mason bee nest or condo (wooden or plastic nests, or paper tubes, all available at garden supply stores or easily built) and mount it near your gardens at about six feet high, facing southeast where it can get sun.
2. Acquire Mason bee cocoon.
3. Get a small cardboard box and place the cocoons inside. Cut a couple of 3/8” diameter holes in the bottom corners of the box.
4. When the blossoms are out and the temperature is 10-12 degrees Celsius, put the box with the cocoons outside near your mounted nest box, along with a container of damp, clay soil on the ground nearby. (They’ll use this to separate the eggs in the nesting tubes.)
5. You’ll see the bees fly about, and in some weeks the condo tubes will be full and the openings will be sealed with a mud derivative.
6. After late May or early June, you’ll notice there’s no more activity. Remove the nest box/condo and store it in a cool space like a garage in a sealed plastic container.
7. In early November, carefully remove the cocoons from the condos. Clean them in a light bleach solution or sand, then store them in a sealed, cool place until mid-March, and start again!
Other good resources:
• Background and guidance on Mason Bee Nests by Linda Gilkeson.
• Foxglove Farm & Garden on Salt Spring Island sells Mason bee cocoons and pre-made Mason bee nests from BeeDiverse, plus guides on how to encourage native pollinators.
• The David Suzuki Foundation has Mason bee home building instructions and how to enhance habitat for other native pollinators.

